はい。ぞえです。
最近アプリの個人開発に興味があり、先月よりIonicAcademyというアプリ開発が学べるサイトに登録しているのでそちらの紹介をしようと思います。

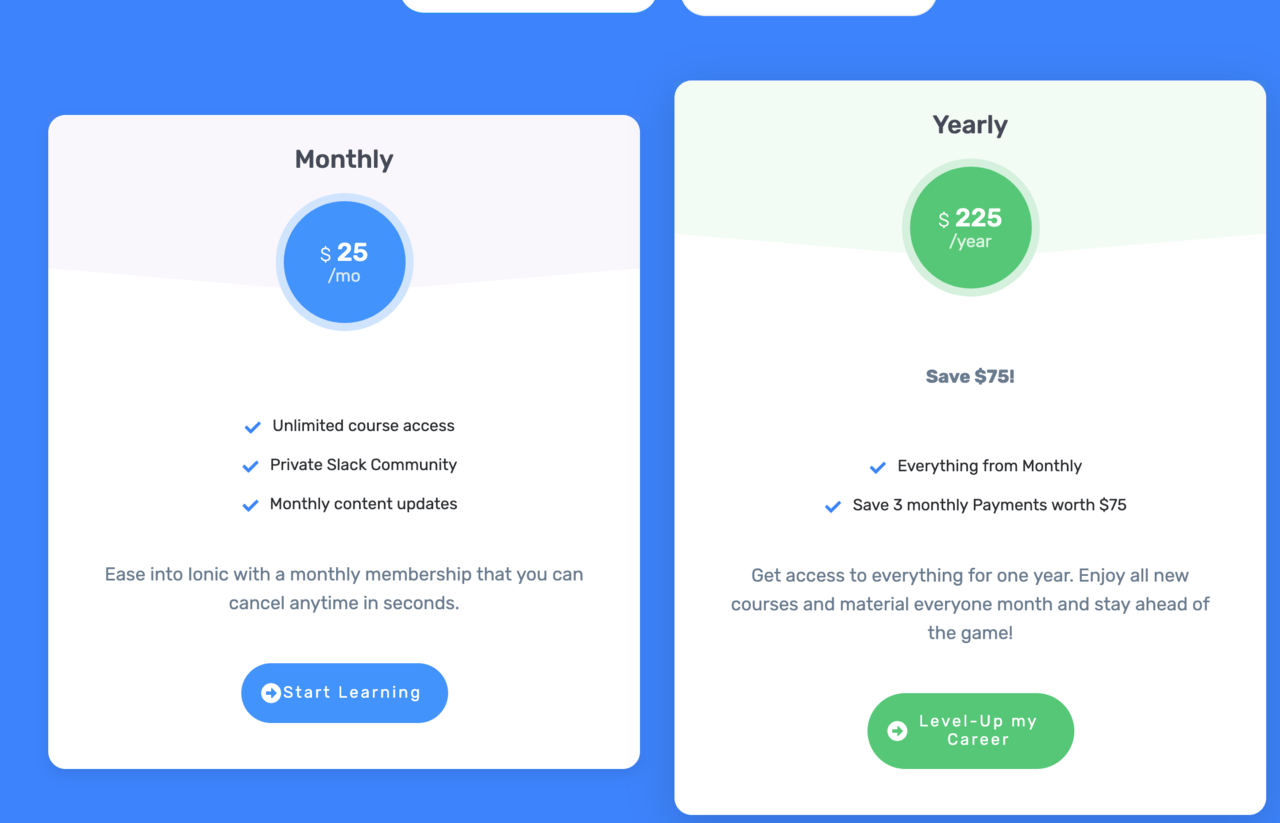
月額料金は25ドルで全てのコースを受けることができます。
目次
- 勉強方法
- basics Building a Personal Finances App
- Creating our Service Functions
- Navigations
- Designing Real World Apps [v4]
- About the Designing Apps Course
- Getting Dummy Data & Assets
- Creating an Intro for your App
- Building a Login Screen with Font Awesome Icons
- Creating Custom Block Items
- Adding Story like Slides
- Using Ionic Segments & List Items
- Passing Data with Navigation Extras
- Creating a Profile Page
- Adding a Parallax Header Effect
- Native Cordova Functionalities
勉強方法
勉強方法はログインして主にRoadmapに従って学習していきます。
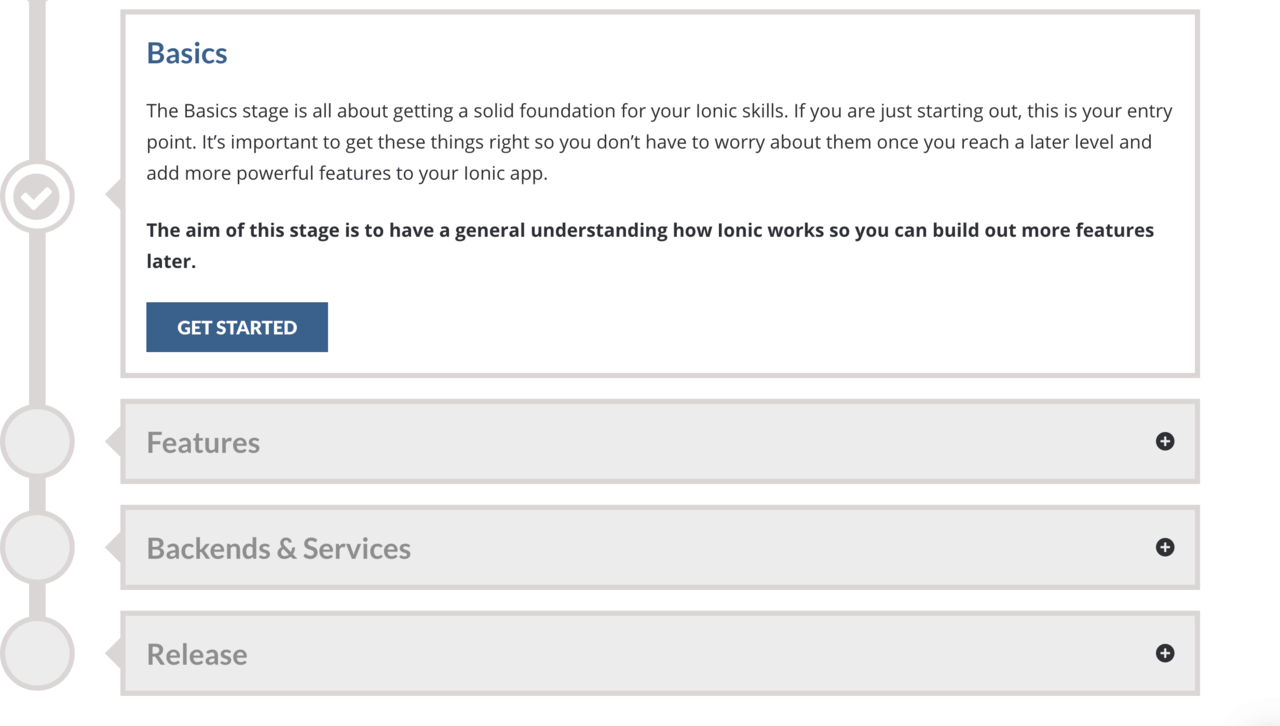
カリキュラムはこんな感じ
Basics
- GettinStartedWith Ionic4
- Layouts
- Building a FinanceApp
- Navigation Extras
- Real World Apps
Features
- Native Cordova Functionalities
- Storing Data
- Working with Images
- Good to know packages
- Animations
- Custom Components
BackEnd&Services
- Integrating a PUBLIC API
- DIY School APP
- Working with Firebase USER Roles
- Firebase Cloud Functions&Push
- OneSignal Push Notifications
- Build your own API with Node.js
- WordPress Integration
Release
- Releaseing to Native App Stores
- Building a Progressive WebApp(PWA)
Baicsで基礎を学んで、Featuresで少しレベルの高い内容、BackEnd&Servicesでfirebaseなどを用いたpush通知などをまなぶという感じですね。
そして、まず最初のミッションがBasicsのgetting startedです。
このgettingstartedではIonicでのアプリ開発の基礎を学びます。
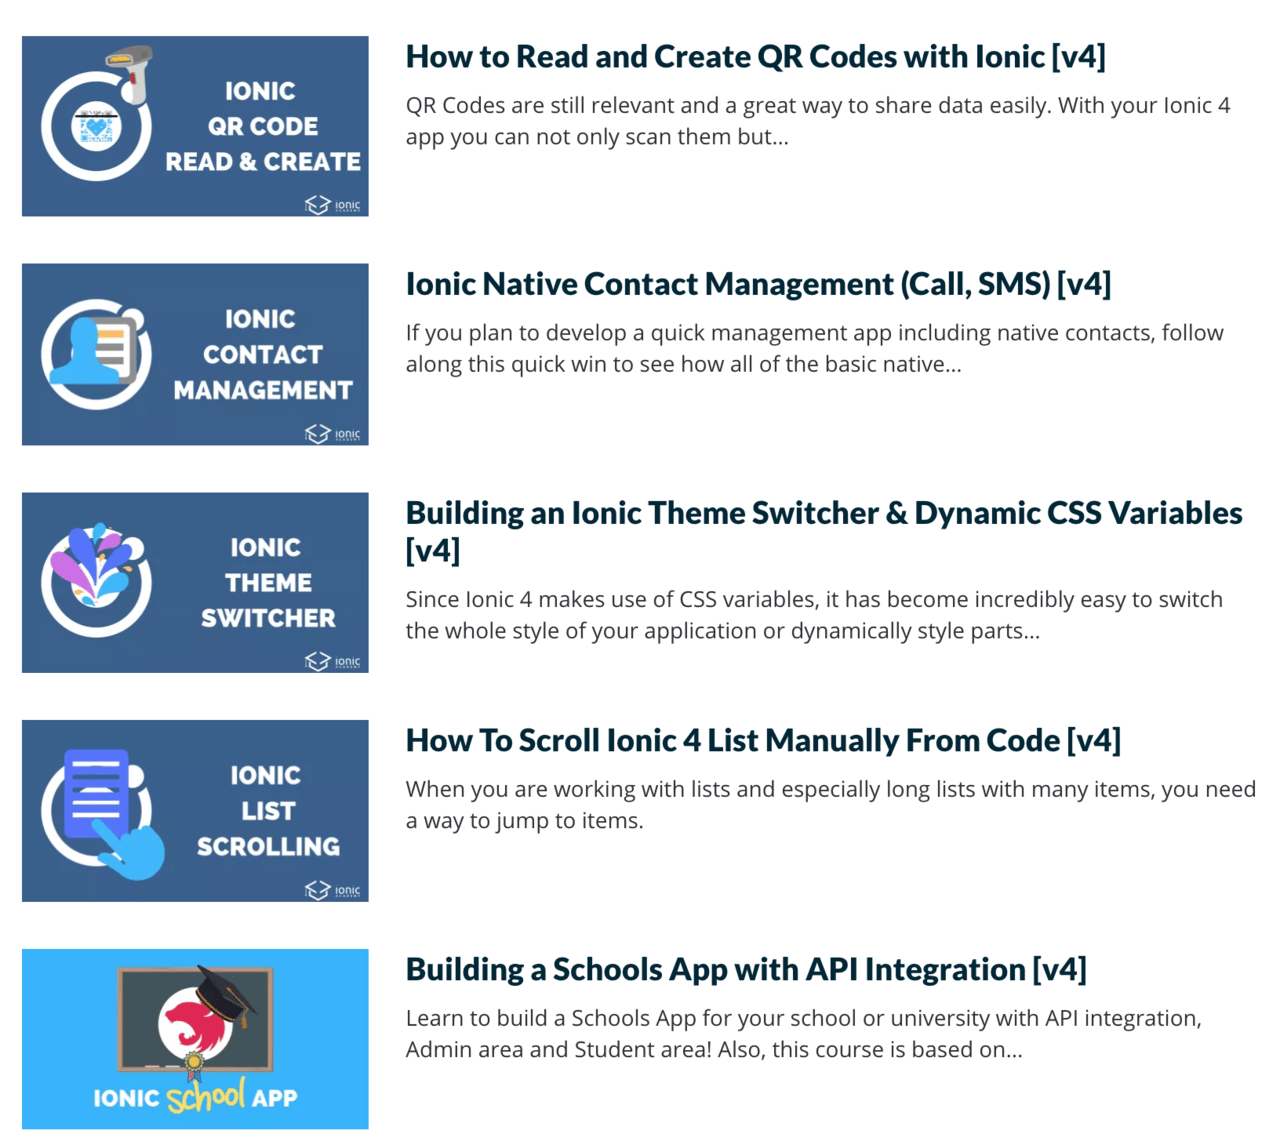
この他にも、単発記事。例えば無限スクロールはどうするのかなど役に立つ記事が随時更新されます
などなど、IonicAcademyは控えめにいってもコスパがよくアプリ開発を学べるサイトなので、興味がある人はもしよければ登録してみてください!
ここからは実際に学んだことや学べることを学習に合わせてメモして行くので、実際にIonicAcademyで学ん
basics Building a Personal Finances App
ファイナンスアプリケーションの作成 構成
Creating an Intro Screen
学べること
ion-slideの使い方
ion-slides
Application Variables ionicのcss
高度なカスタマイズ
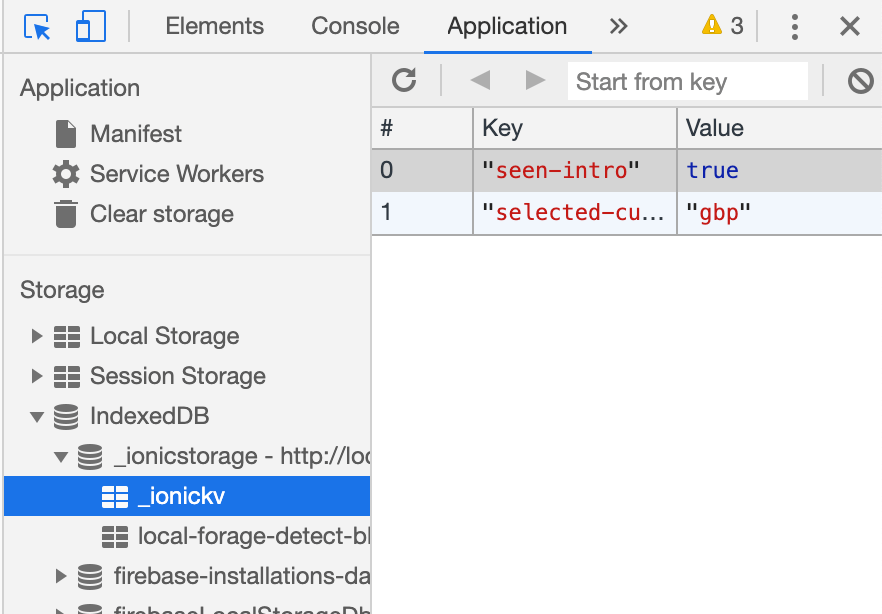
Improving the Intro with Guard & Ionic Storage
学べること
アプリのロジックにガードを追加して、機能紹介ページ(intropage)を一度だけ表示できるようになる。
流れ。
saveAndStartボタンをクリック
storageにseen-introとseen-currencyがセットされる。
router.navigateByUrlでページ遷移
routing app.routing.module.tsでガードをセット
http://localhost:8100/introの場合は、イントロになるが、
http://localhost:8100/でintro-seenがある場合はhttp://localhost:8100/menuに飛ばす。
guardは、intro.guard.tsに記載。
application IndexedDB _ionicstorage _ionickvで確認
Angularだけど。
router
CanActivate
ルートをアクティブ化できるかどうかを決定するガードとしてクラスが実装できるインターフェイス。すべてのガードがtrueを返す場合、ナビゲーションは続行されます。ガードがfalseを返した場合、ナビゲーションはキャンセルされます。
ActivatedRouteSnapshot
特定の瞬間にコンセントにロードされたコンポーネントに関連付けられたルートに関する情報が含まれます。 ActivatedRouteSnapshotを使用して、ルーター状態ツリーを走査することもできます。
RouterStateSnapshot
特定の時点でのルーターのステート
Setting up the Side Menu
学べること
Ionicアプリでのサイドメニューの追加方法(ion-menuの使い方)
ion-menu
Creating our Service Functions
学んだこと
TypeScript
Enums
interface
toastcontroller
ion-toast
Presenting a List of Transactions
cashServiceをDIして、loadTransactionsを作ってTransactions = []にぶち込む
あとは普通にngFor
Deleting Transactions & Cumulated Cash Flow
removaTransactions indexを削除してcashServiceのupadateTransactionsを利用
そして、async awaitでitemの表示を消す
cashflowのcaluculateロジックを実装
Building our Settings Page
特になし
Filtering Categories with Popover
popoverctrl
CLIでfilterpopoverページを追加
app.module.tsにpopoverpageをimport
ondidDismissでfilter.
iosとandroidアプリとして出してみる
ロジック部分はめんどくさいので、yen and 日本語化 イントロページだけを書き変えてデプロイ
Passing Data to Ionic Modals, Pages & Popover [v4]
モーダル、ページ、ポップオーバーデータ受け渡し。
modal popoverはroutingを使用しない
navigateForward
ModalController componentProps
PopoverControlle モーダル風にcomponentPropsforのあたいも受け渡す
[routerLink]=”[‘/second’, value]”
async openModal() {
    const modal = await this.modalController.create({
      component: ModalPage,
      componentProps: {
        custom_id: this.value
      }
    });
    await modal.present();
  }

  async openPopover(ev: Event) {
    const popover = await this.popoverController.create({
      component: PopoverPage,
      event: ev,
      componentProps: {
        custom_id: this.value
      }
    });
    await popover.present();
  }
How to use Ionic Route Guards and Resolver [v4]
ガードとresolverについて
routingでguardとresolverを適用
{
    path: 'home/:id',
    resolve: {
      pokemon: DummyResolveService
    },
    canActivate: [DummyGuardService],
    loadChildren: './details/details.module#DetailsPageModule'
  },
canActivateを利用してbooleanのtrueかfalse
DummyResolveService
pokemonAPIが数字で叩けるからできる
let id = route.paramMap.get('id');

    let loading: HTMLIonLoadingElement;

    this.loadingController.create({
      message: 'Please hold the line..'
    }).then(res => {
      loading = res;
      loading.present();
    });

    return this.http.get(`https://pokeapi.co/api/v2/pokemon/${id}/`)
    .pipe(
      tap(() => {
        this.loadingController.dismiss();
      })
    );
  }
Designing Real World Apps [v4]
About the Designing Apps Course
アプリの概要説明
ログイン プロフィール news segment slide colorswitch logout 等を利用する
Getting Dummy Data & Assets
ダミーデータを利用するために以下の2つのAPIを利用する
https://randomuser.me/
https://newsapi.org/
api叩いてるだけのサービスdata.service.tsを実装
Creating an Intro for your App
まずはguard+canActivateのコンボ
app-module.tsでIonicStorageModule.forRoot()をimportという儀式
storageにhasSeenがない場合のみtutorialに進む
@Injectable({
providedIn: ‘root’
})
root’ の場合はモジュールへの登録不要で Dependency Injection できます。
エラーExpected 2 arguments, but got 1.
Angular8より
@ViewChild(QuilldEditorComponent, {static: true}) quillEditorComponentInstance;
静的かどうかを宣言する必要性ができた。
Building a Login Screen with Font Awesome Icons
特になし。
importしてfont-awesome+css
あえていうならばimportがfortawesomeで何やそりゃ!
import { FontAwesomeModule } from ‘@fortawesome/angular-fontawesome’;
Creating Custom Block Items
異常に凝ったcss
一般的なangularの機能なので割愛
Adding Story like Slides
apiで叩いてきたランダムユーザーをslidesで表示。
slidesのオプションを記載して利用
slidesOpts = {
slidesPerView:4.5,
freeMode:true
}
Using Ionic Segments & List Items
ion-segmentの使い方
https://ionicframework.com/docs/api/segment
初期select selected = ‘sports’;
ngOninitでまずはデータを取ってくる。
(ionChange)=”segmentChanged($event)” [(ngModel)]=”selected”でselectedが変更されたら、またデータをとりなおす
newsでまずは、(click)=”open(n)”
n=ニュースディティール
open(n) {
let navigationExtras: NavigationExtras = {
state: {
news: n
}
};
this.router.navigate([‘app/news/details’], navigationExtras);
}
https://alligator.io/angular/query-parameters/
this.router.getCurrentNavigation().extras.stateでnewsに情報を入れる
state
Developer-defined state that can be passed to any navigation. Access this value through the Navigation.extras object returned from router.getCurrentNavigation() while a navigation is executing.
After a navigation completes, the router writes an object containing this value together with a navigationId to history.state. The value is written when location.go() or location.replaceState() is called before activating this route.
Note that history.state does not pass an object equality test because the router adds the navigationId on each navigation.
Creating a Profile Page
特になし。
ダミーデータ入れてCSS整えて表示してるだけ
Adding a Parallax Header Effect
Parallax興味ないよ〜
Adding a Side Menu to Your App
BONUS: Creating a Dark Mode Switch
サイドメニューは前やった&テーマの切り替え興味なし。
ということでこの章はdone
Native Cordova Functionalities
ネイティブ機能の勉強
あれらしい、web上では機能しない。当たり前
からリアルのデバイスで確認する必要性がある。
How to Display Ionic 4 Local Notifications (Schedule, Payload & Callback)
ionic cordova plugin add cordova-plugin-local-notification
npm install @ionic-native/local-notifications
trigger: { in: 5, unit: ELocalNotificationTriggerUnit.SECOND },
How to Create Basic Ionic Storage CRUD Operations
一般的なstorageを利用してcrudを実装する方法
WINDII
最新記事 by WINDII (全て見る)
- Nuxt.js + Contentful。HeadlessCMSでポータルサイトを作る - 2019年12月28日
- IOSアプリをAppStoreに公開する手順書(Ionic) - 2019年9月11日
- IonicAcademyでIonic&Angularでのアプリ開発を学ぶ - 2019年8月30日
この記事へのコメントはありません。